
Klipper is a firmware for high performance 3D printers.
How does Klipper work?
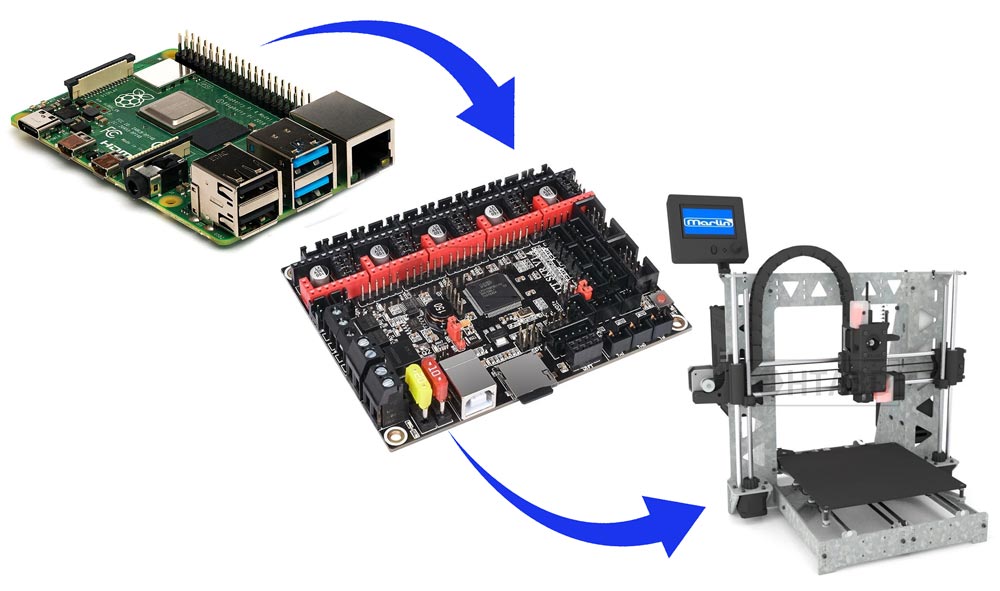
Unlike most firmwares for 3D printers, Klipper is not installed on the 3D printer board, it is installed on a PC or micro-computer, usually on a Raspberry Pi 3, 4 or higher (it can also be installed on other devices).
A small piece of software is installed on the controller board of the 3D printer that acts as an intermediary between the elements of the 3D printer and the computer.
Klipper reads the instructions (Gcode) and transforms them into movements using all the available power of both electronics, planning more movements in a more precise, smooth and efficient way.
In this way we manage to exploit the full potential of micro-computers, much higher than the processing capacity of the controller board of any usual 32-bit 3D printer. Getting better print finishes in less time.
What benefits can Klipper bring us compared to other firmwares?
- High precision movement for stepper motors. The mathematics to calculate the movement are much more precise taking advantage of the extra power that we have.
- Huge improvement in steps per second, even using 8-bit boards, since they don't process Gcode, an 8-bit board can deliver 175.000 steps per second. With more powerful processors you can go up to over 500,000 steps per second.
- More than one board can be used for a printer, for example to use a larger number of stepper motors we can install two boards, as is done fot the Voron 2.4, you can also install a main board and an accessory board, making possible the more complex configurations than you can imagine.
- Everything is configured using a single configuration file, and to update changes you only have to restart the device, there is no recompiling.
- "Smooth Pressure Advance", is an improvement over Pressure Advance, which is smoothed to improve performance, ideal for all printers, but especially useful for Bowden printers where this algorithm significantly improves the result.
- It supports "Imput Shaping", perhaps one of the most striking functions of this firmware, it is a function that compensates for the resonances and oscillations of 3D printers, allowing us to print at higher speeds and accelerations without visible defects in the parts.
- Use Python, a high-level programming language.
- Compatible with programmable macros.
- It incorporates an API server.
- It works with Octoprint, which can be installed on the same Raspberry where Klipper is installed. If you already have a Raspberry you probably don't need additional hardware.
- Supports standard Gcode.
- Etc.
Is this firmware for me?
- If you are looking for simple and straightforward software that just works fine, this is not for you.
- If what you are looking for is a software with infinite configuration and customization options, with which you can get the most out of your 3D printer to print faster and with better finishes, you are in the right place.
Install Klipper
These instructions are written in 2022 as an informative article, it is possible that the instructions change in the coming months and years, so we recommend visiting the official instructions at this link:
https://www.klipper3d.org/Installation.html
Installing Klipper consists of the following steps:
- Prepare the OS image on the SD card.
To do this, the simplest thing is to use "Raspberry Pi Imager":
https://www.raspberrypi.com/software/ - Once downloaded and installed, we insert the micro SD card into our computer and configure the operating system.
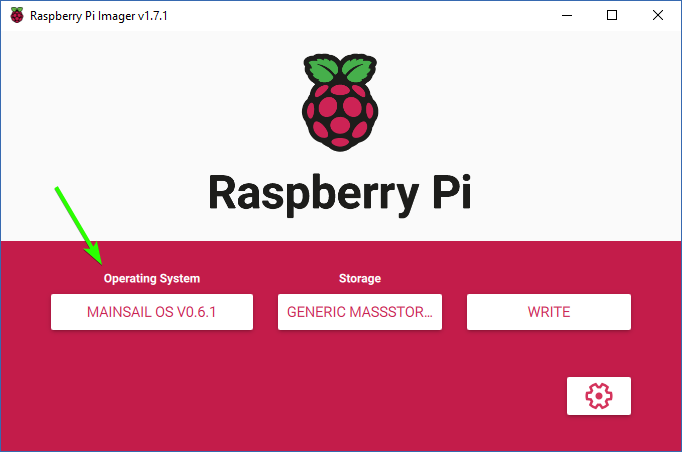
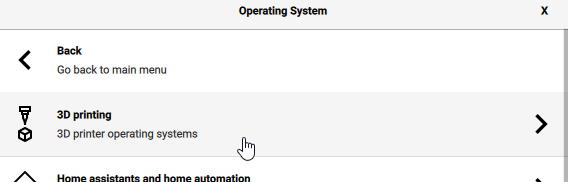
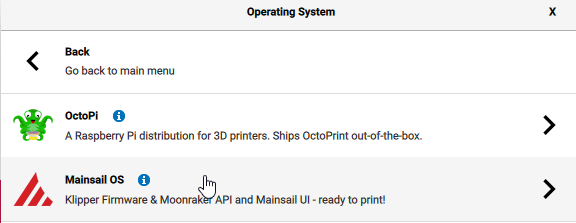
By clicking we go to Mainsail OS, a package with Klipper and Mainsail already pre-installed. We can follow this route: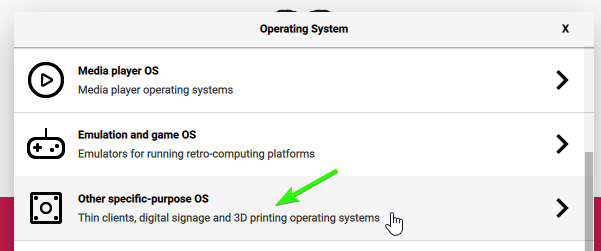
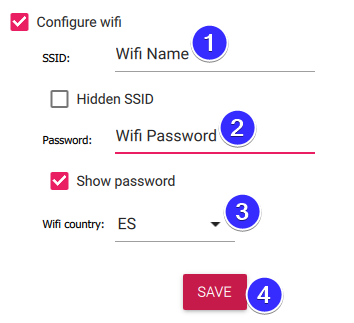
- Since we have selected the most recent version of Mainsail OS, we can select the SD card and configure the wifi. For this we have these options:
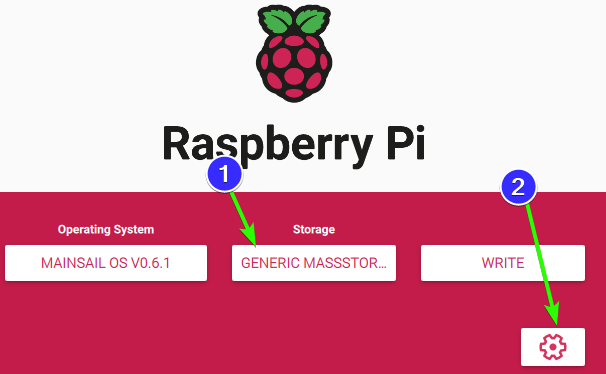
It is important to choose a quality and fast micro SD card, since a slow card can hinder the performance of the device. - Prepare the microcontroller, our 3D printer board needs specific software to obey the Raspberry Pi with Klipper.
- The first thing is to connect the board to the network, either using the wifi connection or the network port of the Raspberry board.
- To find the IP, the simplest thing is to enter our router and check the IP of the connected units.
- Once we have the IP, we have to communicate with our raspberry Pi, for this we can use PuTTY, which can be downloaded from this URL:
https://www.chiark.greenend.org.uk/~sgtatham/putty/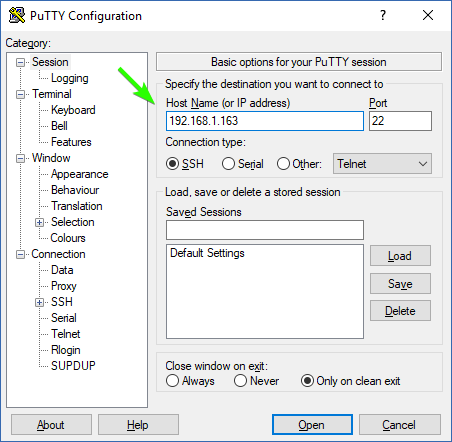
In this example our IP is 192.168.1.163
Once inside, it will ask us for Login and password, by default they are these:
pi
raspberry - Once inside the terminal we can send commands to our Raspberry. We can use the official method, or help us from KIAUH, in this article we are going to explain the official method, but we give you the link to KIAUH: https://github.com/th33xitus/kiauh
Prepare the file for our microcontroller: - cd ~/klipper/ make menuconfig
- And we will enter a menu where we have to select the board that we are going to use, as well as the ports that we are going to use to communicate, for example USB or UART.
- make
- We command "make" to generate the file that we have to upload to our microcontroller and it will be generated in a few seconds.
- Now that we have the file ready we need to upload it to our board, this can be done using the USB connection with the Raspberry board or the micro SD card reader included on most boards. In this tutorial we will explain the micro SD method.
- To download the klipper.bin file, we can use FileZilla:
https://filezilla-project.org/download.php?platform=win64
And enter the IP as we did with Putty, you have to fill in:
IP= The one you have, in our case 192.168.1.163
User name= pi
Password= raspberry
Port=vacío, 21 o 22.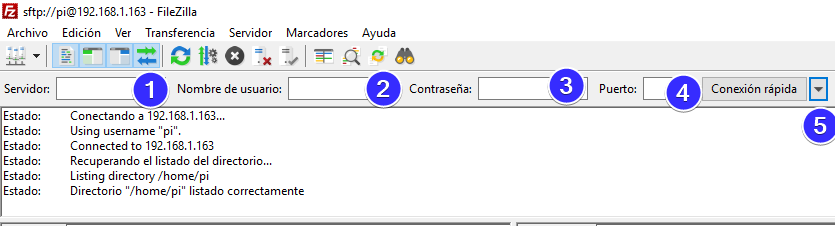
Once inside, we go to the following path: /home/pi/klipper/out and download the klipper.bin file
We rename that file as firmware.bin and copy it to the micro SD card, then insert it into the board and turn it on to allow this part of the firmware to load.
The file name will change from firmware.bin to FIRMWARE.CUR indicating that the process has been done.
Once all this is done, we have Klipper correctly installed, but it will not work, since we have to configure it.
Configuring Klipper
If we have not done it before, now it is necessary to enter Mainsail (or Fluidd for those who prefer it), for this we copy the IP to our computer connected to the same network. In our case we use the IP: 192.168.1.163.
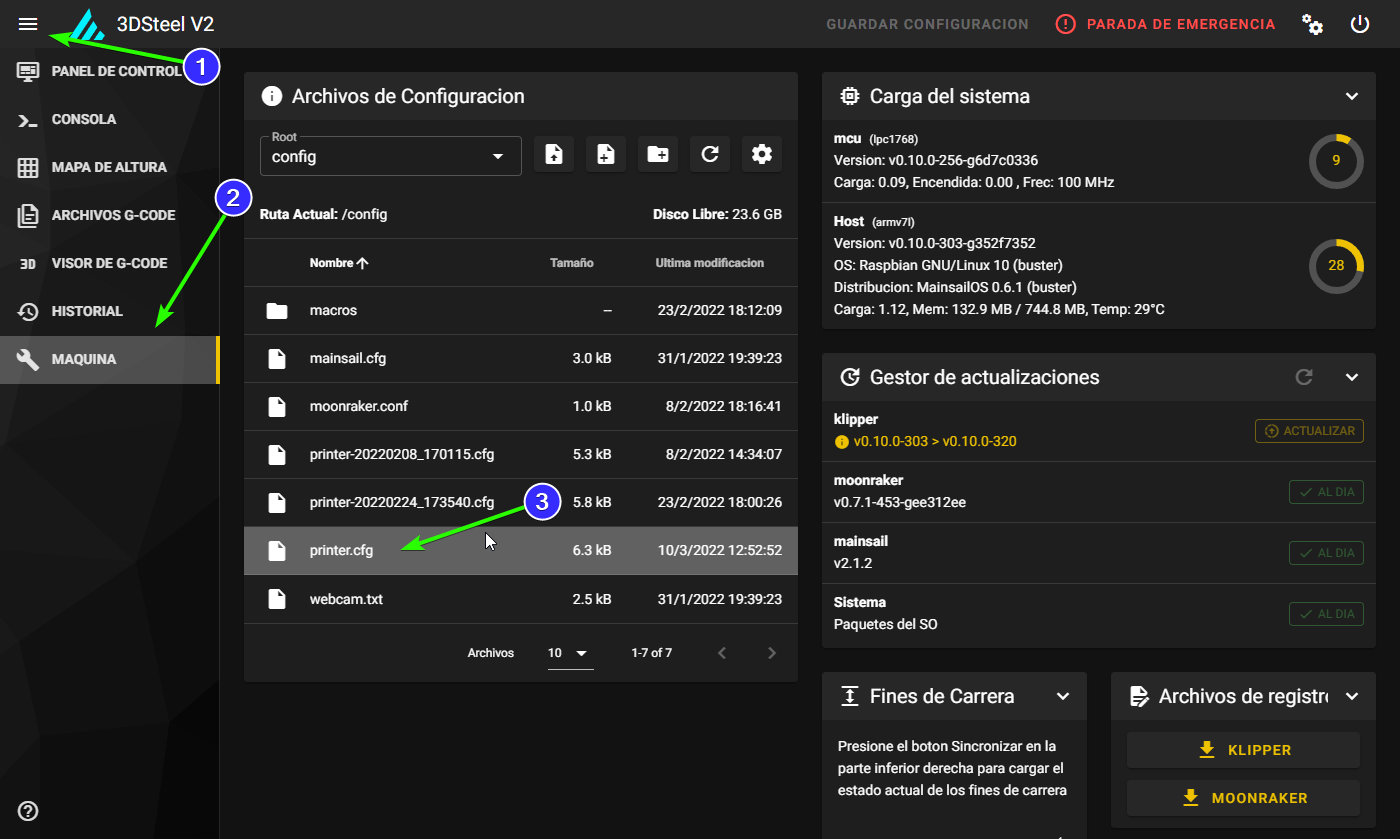
We move to the "Machine" menu and edit. we copy or create the file printer.cfg
Here we find with one of the main advantages, this file is independent of the version in which we are, so we can frequently update our version of Klipper without touching the configuration, in this way we will always have the latest news, without the need to prepare configuration files for each version of the program.
We can also edit this file without having to compile or load anything, simply by editing a few lines of code we can, for example, change the number of leveling points, which in Marlin would necessarily mean recompiling the program.
We can find the Klipper configuration references at this link:
https://www.klipper3d.org/Config_Reference.html
Macros in Klipper
This is one of the functions most desired by advanced users, although it is also more complex for neophytes in the field.
Advantages:
- Infinite versatility, it allows us to create standard orders, which we can then edit:
- For example, we can create a macro to start printing, so that it reads the file with the temperatures we want, so that the same Gcode can be printed with different temperatures depending on the material and brand that we are using, without the need to generate another different Gcode, nor edit it.
- We can define complex commands for multi-head systems, in which at each layer change, do head cleaning or purging commands, only the macro instruction will be in the Gcode, while the detailed instructions will be in the macro file.
Disadvantages:
- Marlin has some guided functions, such as the filament change with M600, which are very convenient, in Klipper they are not by default, so we have to download these macros separately and configure them, although they work well, they are not so "friendly" as in the case of Marlin.
You can download these macros for Klipper, a very useful collection:
https://github.com/Desuuuu/klipper-macros
The author recommends that we create a subfolder called "macros", and then add this simple line to our printer.cfg file:
[include macros/*.cfg]This way our printer.cfg file is "clean" of macros, and each macro is located in a separate file within this folder, where you can easily edit, add, delete and share each macro individually.
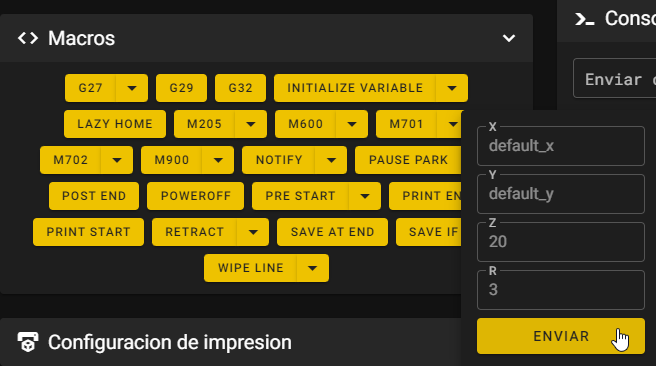
Once we have the macros installed we can use them in two ways:
- From Gcode, such as the M600 command, which will work similar to how it works in Marlin.
- From the macros panel, where we can also edit some arguments by clicking on the dropdown located to the right of each macro, in the case of configurable macros.
Using Klipper
Una vez instalado y configurado Klipper es muy intuitivo de usar, ya que su interfaz web es muy amigable, Este punto casi que nos lo podríamos saltar, pero vamos a mostrar la interfaz para quien no la haya visto aún:
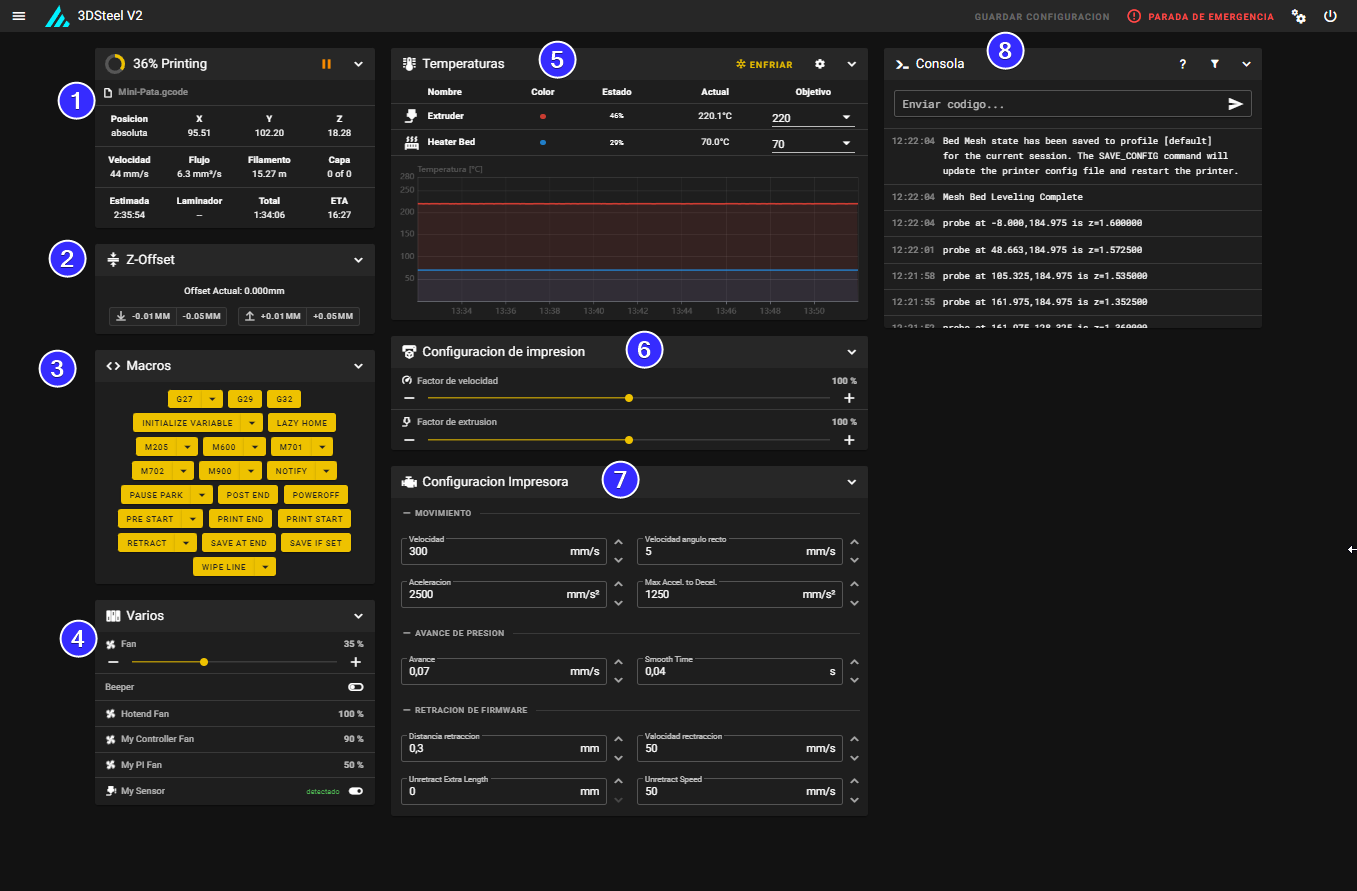
- Printing status, where we can pause and cancel printing.
- Z-offset adjustment, similar to Marlin's "babystepping".
- Shortcut to installed macros.
- Fans and accessories.
- Temperature graph.
- Velocity factor and extrusion factor settings.
- Printer configuration easily editable and very present.
- Console, where we can enter any instruction.
In addition to the main panel, we find:
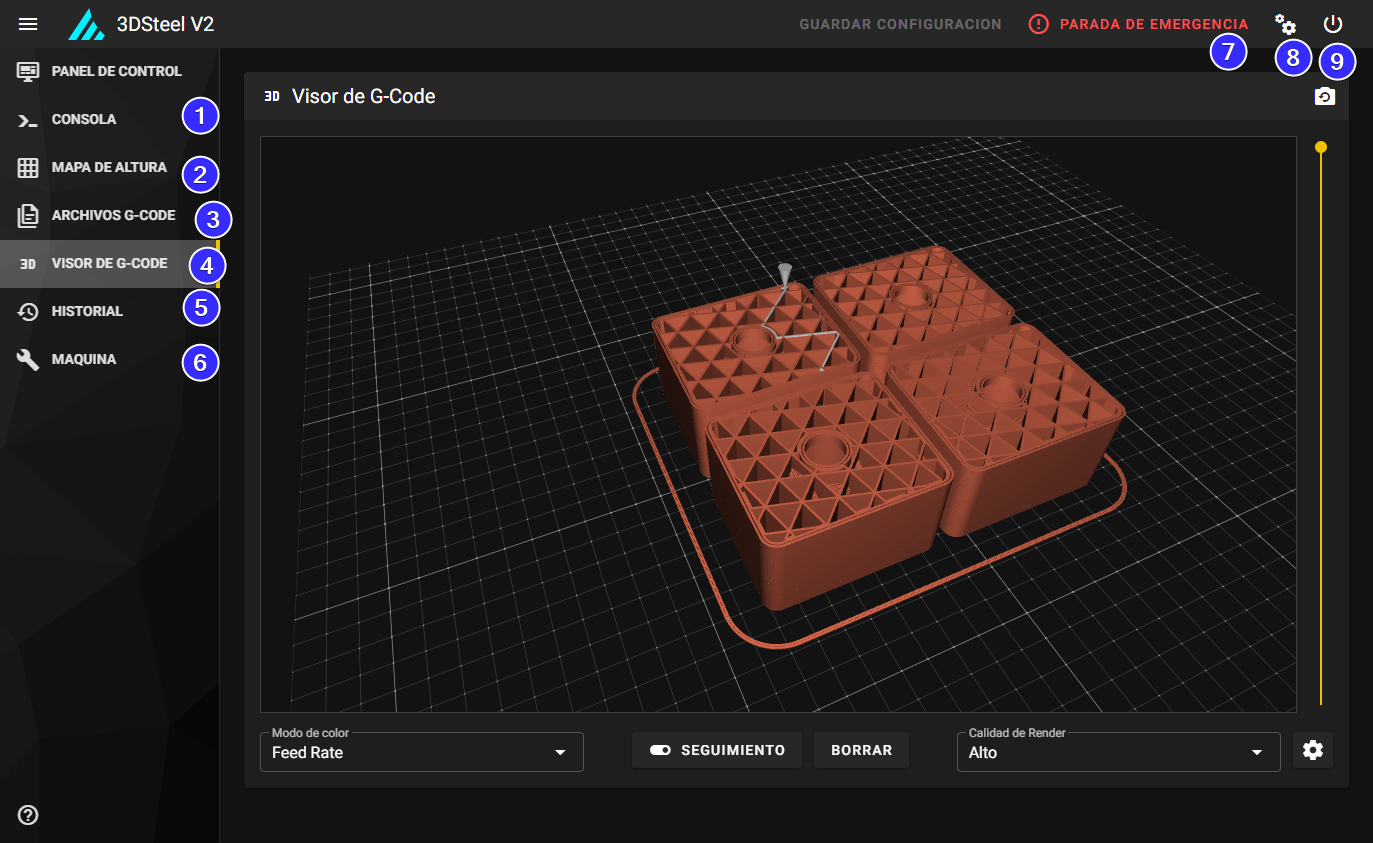
- Console, where we can enter codes directly for Klipper.
- Height map, where we can see the shape of our bed
- Gcode files.
- Gcode viewer, very good, shown as an example in this image, we can remotely see the line that the print goes through, in addition to analyzing already generated Gcodes.
- History, with statistics.
- Machine, here we can update the version and edit the configuration files.
- Emergency stop.
- Configuration menu, here we can make some adjustments such as updating the colors of the interface.
- Power off and restart button. We advise powering off from here before disconnecting our printer from the network, as Raspberry are microcomputers.
2 Comment(s)
Awesome and very straightforward I'm stoked to try out and see if I can make it all work. I have drooled over the sonic, klipper, ect pads day dreaming about eventually having one. I just couldn't justify the expense other than I just want it now after your page there are many benefits of doing such an upgrade.
Thanks, it's not that expensive if you just add a board like the MKS PI: https://www.hta3d.com/en/mks-pi-64-bit-board-for-klipper-raspberry-pi-replacement-12-24v
Buenas !!!
Estoy intentando configurar Klipper en la 3dsteel, ( ahora funciona con marlin 2. en un Arduino Mega con Ramps 1.4 ),
pero estoy teniendo problemas con la configuración... he empezado con el archivo base que viene en Klipper " generic-ramps.cfg " y me funcionan los motores, los finales de carrera, la cama y el extrusor, no he ajustado los pasos por mm y no consigo que funcione el BL-touch, en cuanto lo incluyo en la configuración deja de funcionar todo ...
he probado a cambiar los pines, de sitio en el el código .. pero siempre me pasa lo mismo...
no se que estaré haciendo mal...
alguien ha probado y tiene un .cfg para probar ??
gracias..
Tenemos una configuración hecha para SKR 1.4, quizás te pueda servir como referencia: https://drive.google.com/drive/folders/1IYPgEzBU_PoBIuHx5PUfCiqLUMqyvFu9
Gracias,!!! lo reviso , seguro que me sirve...
Leave a Comment