
Complete DIY Off-Grid Solar Irrigation System
Complete DIY Off-Grid Solar Irrigation System
- by Mike@PiedmontFarmstead
- The 'Stead
- 12 Comments
- September 7, 2018
Solar Irrigation System Overview
Having a solar irrigation system was something of a novelty to us, until we got tired of hand watering our garden. You may have come here by way of our rain barrel project post, but if not feel free to check that out here.
We used to water our gardens by hand, which meant dragging the hose out and standing around for 30-60mins using our new rain collection system. Or leaving a sprinkler running while our well pump was just pumping all that water out of the ground and onto our veggies. That had to stop. It was taking too much time and we were concerned about our water usage.
So, in comes the idea to automate our watering. It wasn’t such a crazy idea until we threw a wrench in there that is had to be completely off-grid. What we came up with will be explained in more detail below. In short, it is an automatic solar powered off-grid irrigation system.
")

Our system is adaptable for many size gardens. We developed it to fit the need for our small garden. We also needed to make the system mobile, self-sustaining and easily expandable. A off-grid solar irrigation system fit this bill perfectly!
We started this adventure with our previous project, a 550 gallon rain harvesting system, as a source of water. We adapted this new irrigation system to the rain barrels.

Step 1: The Math
One of the first things we needed to do was the behind the scenes math to figure out our system, identifying the battery, controller and solar panel. There are many calculators for this online that make things easy. You will need to know how many watts your system will need and how many hours or minutes that you plan to run the system.
In our case, the biggest draw on our system is the pump with 60 watts and our solenoids that draw 18 watts (our timers draw very little power). Note: We have two solenoids on this system with only one operating at a time.
We run the pump and solenoid for 10 minutes each(watering for 10 minutes) and we have 2 solenoids/zones on our system, so,
(60W+18W)* 20mins(.33 Hours) = 25.74 Watt Hours
Then, We assume a 2% gain to be safe = 26.255 Watt Hours
Now we need to convert Watts into Amperes, dividing those Watt Hours by 12V gets our 2.188 Amp-Hours per day.
Typically, it is good to build in a buffer of 3-5 days in case you have cloudy days where the system is not getting enough sunlight to recharge the system. Here is the cool thing about irrigation: if it is cloudy you are most likely not going to be irrigating much, Cloudy conditions = less evaporation. So, we went with a 3 day buffer.
3days * 2.188 Amp Hours per Day = 6.5637 Amp Hours
At this point, we need to look at our battery choice. Sealed Lead Acid (SLA) batteries are going to be the most economical choice, though Lithium-ion will perform better. It is important to know that SLA batteries can only safely be drained to 50% before they retain permanent damage. To calculate what size SLA battery we need, we take our previous value of 6.5637 Amp Hours and double it to ensure we never go below 50% charge.
6.5637 Amp Hours * 2 = 13.1274 Amp Hours
In this situation a 14 Amp Hour rated battery would do the trick; however, that would be draining the battery to the very edge. If there are 4 days of clouds, you’ll drain the battery past 50%, so it is well advised to go with a higher rated battery. We chose a 12v 35 Amp Hour battery. That way we theoretically have up to almost 8 cloudy days until the battery is drained to 50% capacity.
Now that we have our battery, we will need to find our solar panel size to recharge the battery. Back to math:
4.5 Hours of solar isolation average per day, specific to our area(found online here)
100 watt solar panel(Standard size/rating for readily available panels
And, we find that we need less than .25 panels on a perfectly sunny day to recharge our battery, haha. We purposely went with one 100watt panel to allow room for more zones and run time in the future if needed and they are pretty inexpensive.
After all that we found out that we needed:
- 35 Amp-Hour Battery
- 100 Watt Panel
Step 2: the build
The first and most important decision to make was to find a location that works with the water lines to feed our pump and an adequate unobstructed view of the sun.
Our rain barrels were about 80 feet away, not too far and well below the bottom of the barrels to allow gravity to prime the water pump.
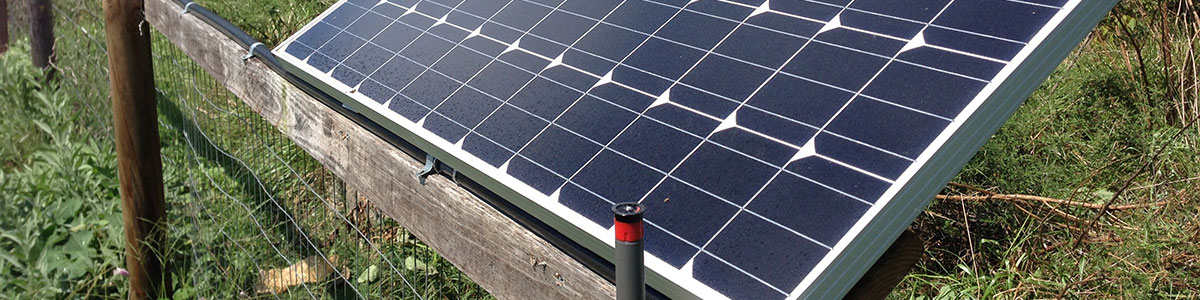
For the solar panel mounting, we chose to mount the solar panel on the north side of our garden fence and provided a south facing view of the sun unobstructed.

After finding our location for the solar panel, we were ready to mount the panel on the fence…but hold on there is a certain angle that the solar panel needs to be mounted at to optimize the sun exposure.
The general rule(we used this) is to find your latitude and apply that to degrees. For our system and location, we are at about a 35 degree latitude, so we mounted our panel at a 35 degree angle facing south. Our panel measures 19.7 inches wide so we mounted it on a 20 inch wide mount made of out scrap 2×4 lumber we had laying around. With those two lengths we can figure out that we need to have the northerly end of the panel 14 inches higher to make a 35 degree angle(See an easy calculator here).
The controller and battery are best to be located close to the panel, to keep wire lengths short and access easy. We got lucky and had an air conditioning platform laying around our house and used that directly under the solar panel to keep the electronics above ground away from water.

Step 3: The Wiring
Wiring the system turned out great and worked perfectly. We wired from the solar panel to a controller to the battery. The controller will charge the battery and a separate system is wired from the battery to timers controlling relays that turn on the pump and solenoids. So we have solar powered irrigation timers that control it all. They are each wired like this:
Solar Panel then Charge Controller then Battery
Battery then Timer then Pump & Solenoid
Solar panel wiring is straight forward and well documented with literature included for the charge controller or solar panel. The timing system we will go over more below.


How this works: The 12V timers control everything here. Once the relay in the timers trip, they turn the pump and solenoid on for a specified time. The timers are pretty versatile and we have them coming on for 10 mins in the morning at 6:00am for zone 1 and 6:30am for zone 2. I will say there is some risk that the timers overlap, which is the reason we spaced the zones 30 minutes apart. This has been working great. IN the timers, there is an option to bypass the timer and turn them off (if raining) or to manually turn them on.
We have also installed a simple on/off switch between the battery and pump. We use this for a garden hose outlet to water other areas with the rain water we’ve collected in the rain barrels. We detail this more below and has become very useful in watering other areas.
Step 4: The Plumbing
Plumbing the feed lines and supplying the irrigation is next. We buried a ¾” poly line between the rain barrels and the pump about 5 inches underground. We added a drain valve at the lowest point in the line, for the winter so the lines don’t freeze and we have an easy way to empty the system. The rest of the plumbing before the irrigation lines looks like this for our system,


We added an additional split between the pump and solenoids for a garden hose connection(pictured) for when we want to use a garden hose to reach something outside of the garden. There is also plenty of space to keep adding more zones by adding more solenoids inline in this same pattern with supporting electronics.
Step 5: The Irrigation system

As with all irrigation systems some calculations and sizing for each of the zones is necessary. The limiting factor is our pump and the GPM(gallons per minute) that it can provide. In this case, our pump can supply 3.5GPM @ 45psi. The pump also has a built in feature that it maintains 45psi and the pump will turn off once that pressure is reached if no drop is detected(very beneficial).
With our pump each zone should not exceed 3.5GPM. We need to add up the flow ratings of all of our spray nozzles and divide them into separate zones. We chose to use spray nozzles versus drip irrigation with this system just as preference. Our spray nozzles flow around 2GPM for each 360° nozzle.
Each sprayer is rated at 10 feet and we can safely add up the radius sprays of each to reach out final total. In our case, 2 sprayers of 360° is the maximum for each zone, or a total of 720°. So we divided our zones out like this;
- Zone 1 – (2) 360° sprayers
- Zone 2 – (2) 180° sprayers and (4) 90° sprayers
Once we divided out or zones we ended up with 2 zones at 4GPM, which is slightly higher than the pump can supply but fine for our needs. As a result, our spray patterns are a bit less than the advertised 10 feet, okay by us.
Once we figured this out it was time to put all the fittings together and run the lines. We chose to run the first zone with center lines underground a few inches through the center of the garden and then run the two center nozzles about 4 feet up on supporting stakes. The second zone follows the top of the fencing surrounding the garden.

Once this is completed, its time to go over everything to make sure you missed nothing and turn the system on for a leak test!

The solar irrigation system has been working great this year so far. We’ve have time periods as mentioned in the rain barrel build, of about 6 weeks with no rain. So we ran out of water in the rain barrels(only good for about a week of daily watering with this system) to water the garden and had to run a hose to the system to water. This required unhooking the pump from the system and connecting our garden hose fitting to a hose connected to the house. Then we opened the spigot and ran the system as normal.
We have plans to upgrade our garden space and naturally water is going to be an issue. We will have to make watering part of those plans as the amount we use for only this small garden will need to be significantly more. A pond will most likely be the best bet here, so stay tuned for that project!
Thanks for reading, post any comments or questions below,

TOOLS LIST
- (1) Side Jaw Crimper Tool for Stainless Steel Sprinkler Crimp Clamps
- (1) Multi-Tool Wire Stripper/Crimper/Cutter
- (1) Utility Knife
PARTS LIST
Solar/Wiring Supplies
- (1) 100W Solar Panel
- (1) HQST 20 Amp MPPT Solar Charge Controller
- (1) 12v 35AmH SLA Battery
- (2) 12V Timer with Relay
- (2) 12V Relay to Control Pump/Solenoid
- (1) 10AWG Fuse Holder
- (1) 15A Slow Blow Fuse
- (1) 20A Fuse for Battery to Controller
- (1) Solar Panel Brackets
- (1) MC4 Cables 5′
- (1) Red 14 Gauge THHN Stranded Wire, 100ft
- (1) Black 14 Gauge THHN Stranded Wire, 100ft
- (1) Assortment of Insulated Electrical Wire Terminals
- (1) Multi-Tool Wire Stripper/Crimper/Cutter
Plumbing Supplies
- (1) Shurflo Fresh Water RV Pump 3.5 GPM
- (1) Shurflo Twist on Filter
- (2) 3/4″ Brass Solenoid
- (1) 3/4″ Barb – Garden Hose
- (1) 3/4″ Poly Pipe (100ft)
- (1) Storage Tote to put all electronics and pump
into out of the weather or something similar to this one.
Comments (12)
david dewey December 16, 2019
In your wiring diagram what is to stop Zone 2 relay from operating when zone 1 timer is powering the pump or vice versa. Have I missed something?
Mike@ThePiedmontHomestead December 16, 2019
On the timers, the right 2 terminals are switched, normally open. On the relays the same is also true, right terminals are normally open. Power is only allowed to the zone’s relay when the timer becomes closed (at the specified time). The relays are also double throw so on the diagram the hot wires(red) going to the solenoid(right line under the relay) and pump(right line under the relay) are normally open. This would not allow power to cross between, but allows either timer to cycle the pump on regardless of zone. Not sure if that helps?
Rex April 18, 2020
How large of garden did this system cover and what part of the country area you located. Trying to design a similar system for a fairly large garden and wondering about size and water use
Mike@ThePiedmontHomestead April 21, 2020
it was a 24’x32’garden space. If I remember right the 550 gallons of water we had for it would last about 10 days with no rain. Though I can’t recall what the water schedule was for that! I took the GPM of all the sprinkler heads and figured out usage that way. Hope that helps some!
Kay June 5, 2020
Just wondering do you think this would work with a drip emitter type system? Can the system handle the back pressure?
Mike@ThePiedmontHomestead June 8, 2020
Drip systems typically run about 15-20psi and the pump we used is made to hold 45 psi constantly. I would not see any issues at all, you would just need to install the typical items for drip lines: a pressure reducer to drop the pressure and a filter to make sure the lines do not get clogged. The only issue I would see is the limited GPM the pump can flow as a bottleneck.
jc September 17, 2020
Hi, nice write up. I believe you forgot to list the solenoids used on this project. Also what was the total build cost?
Mike@ThePiedmontHomestead September 17, 2020
I honestly cannot remember what it had cost and I’ve seem to lost the sheet I had for it. It has been through a lot of changes to adapt it for out 1/5 acre area now so it is difficult to say. The solenoids were some cheap 3/4″ 12v ones I had found off amazon. They’ve held up fine so far, though with our future plans we’re going to move to irrigation type solenoids.
greg September 30, 2020
Thank you for that detailed write up; it inspired me to do a build very similar to yours! My wife and I are on a small plot in the PNW, and are wanting to get into homesteading, so it’s incredibly great seeing what other people have put together for ideas on how to get ours going.
I was wondering how your irrigation system was working 2 years on? Particularly the longevity of your pump (we’re using a similar 12v dc spray pump — in our case a northstar 7gpm @65PSI 12v DC), and what you’re doing about frost/freezing weather?
Mike@ThePiedmontHomestead September 30, 2020
The only issues we have had was the charge controller went out on us couple months ago, what I assume happened was it got too hot in the box/bin. So we ended up mounting the new one under the panel to get plenty of airflow. The pump we used for 2 years and it worked great, the filter we would have to clear 1-2 weeks because of the rain water system. No real issues outside of that, we still have the same valves, though the system has changed alot. We now have 4 zones and around 1/5 acre under irrigation. It has worked great, the timers are awesome and have plenty of on/off times to help cool lettuce in the summer so we can grow all year long.
For the winter we drained the system out, though in our area we don’t get really cold temps for quite some time. We grow all year, so we would just turn it on on warm days when needed, which isn’t much during the winter.
John Price March 26, 2021
Thanks for the amazing write up! I am setting up a similar system but with only one zone and am a novice when it comes to electrical. I have searched the internet far and wide but am having trouble finding something that shows a wiring diagram for the relay. I can almost wrap my head around it with your diagram and pictures but am still somewhat confused which wire goes where and it is keeping me up at night. haha. I have the same relay you listed on the website and can see the white hooks to the timer and pump, the yellow is not hooked up but I can’t figure out where the blue, black and red wires hook to? If you could help I would be forever grateful.
Thanks, John
Mike@ThePiedmontHomestead March 30, 2021
On the Amazon product page in the list of parts use the diagram in the product images called “Normally off relay with a Positive Trigger”. The trigger source is the timer and the device is the solenoid. Your relay should have those same #’s on the for you to match up to the diagram. Hope that helps!